
Fedora 23 Workstation
- 16 minsWhat!? Two posts in a single day! That has (almost) never happened! Yes, in keeping with my promise in the previous post, here’s my thoughts on the new Fedora 23 Workstation release.
Fedora was the first Linux distribution that I ever used; Fedora 7 it was, I believe. I was in the first year of college and one of our CS profs asked us to put Fedora in our new college provided HP Laptops(on which we had already installed Windows XP, of course). The image was hosted on the college network. I downloaded it, went back home and got to work installing it, excited to find something new. Of course, at that point of time I didn’t know anything about installing Operating Systems outside of Windows XP. So, over the course of the installation procedure, I was appalled to find out that fedora had blown my XP partition to kingdom come along with all the data I had. The whole fiasco was my fault, of course, but I couldn’t help cursing at the Fedora developers. After that I was using Ubuntu for a long time (started with 7.10 if i remember correctly) and then I moved on to openSUSE making pit stops at Arch Linux and some Fedora versions along the way. Actually before installing Fedora 23, I was using openSUSE 13.2 and had upgraded to openSUSE Leap with KDE Plasma 5. But Plasma 5 is not yet at the stage that I want it to be and I suffered quite a few glitches, crashes and annoyances. So I started looking for a GNOME distro, which led me to Fedora 23 Workstation. Okay enough rambling, lets get this beast of a review/impressions started.
A disclaimer before I start – this is not going to be a review or how-to in the traditional sense. I am just going to document my experience of using F23 over the past few weeks; things that nagged me and things that I liked. I downloaded the Fedora 23 Workstation 64-bit image via torrent and proceeded to install it on my Acer Aspire V5-573G.
Fedora 23 uses a (GTK3 based?) Anaconda as its installer. It is a very good looking setup program and differentiates itself from other OS installers by being non-linear in nature. By non-linear I mean that once you launch the installer, it throws you into a screen which can be basically considered a hub. From this screen you can launch other screens for changing your keyboard setup, setting up time zone, creating a user and setting up your partitions. You can do all this in any order you like. While I didn’t have any problems with this, I can understand how new users might find this a bit wary. Something like Ubuntu’s installer which takes you through all the same screens one after the other is likely to be much more conducive to the people new to Linux. But then again, both the distributions seems to have very different target audiences. While Ubuntu is almost universally agreed to be the newbie distro, Fedora with its Workstation version over the past few releases has been targeting the developer user base. The only complaint I have with the install process is with regards to the partitioner, which seems plain confusing at times. Case in point: Before installing Fedora, I had a dual-boot setup comprising Windows 10 and openSUSE Leap 42.1 installed with the BtrFS for the root directory and a /data directory where I had mounted my NTFS data partition to be shared between Windows and Linux distros. Now anaconda showed me all my openSUSE partitions grouped together under the banner “openSUSE”. Under this group also listed was my /data partition and this data partition was listed again under the “Windows”(or “other”?) group. Since I had decided to replace openSUSE with Fedora, I deleted all the openSUSE partitions and created / and swap partitions for Fedora. But I was stumped for a few moments as I couldn’t decide what I should do with the /data that was still showing under openSUSE. If I deleted it, would it just remove the mount point or delete the entire partition? If I kept it, would I be left with some remnant of openSUSE in the installation e.g. the GRUB menu or somewhere else? I realized that would not be the case, since I was removing the entire openSUSE partition and GRUB wouldn’t find it when it scans for installed operating systems. The installation went smooth after that and sure enough, I didn’t find any remnants of openSUSE. The point is I realized this but new users may not. They might get confused and end up deleting their data and whatnot. What could be done to improve this is to group only the OS related partitions(say the / and /home partitions) under the OS-name banner and keep other custom created partitions separate. One other thing that might add to the usability of the partitioner is if they can provide a graphical display of the partition structure like Ubuntu and openSUSE do. That will definitely add to the feedback process from the system to the user regarding their actions.
After the installation process completed, I rebooted my PC and was greeted with a black and white GRUB screen. The fedora GRUB correctly detects my Windows installation to be Windows 10 and titles it as such unlike openSUSE which thought it was Windows 8. A very minor observation but very important to the usability perspective nonetheless. Fedora 23 comes with GNOME 3.18 which is the latest and greatest GNOME release. I had been a GNOME user when I started using Linux, then moved to openSUSE/Arch Linux + KDE 4 when GNOME started shipping on GNOME Shell and Ubuntu started shipping Unity. Back then I found GNOME Shell to be too unstable and feature-less and Unity, well frankly, I found Unity to be boring. So, coming back to GNOME after all these years, I am pleased to say that I love it. It is stable and properly usable out of the box, although I did add a few extensions. I never completely understood the what Activities were meant for in KDE4, but I should say I really like the Activities workflow in GNOME probably because the entire shell is based around it instead of just being an extra. You press the Super(Windows logo) key(or you could just click on the top left corner where it says Activities)to land into the Activities overview screen to get an OS X Expose like view of all your active windows.
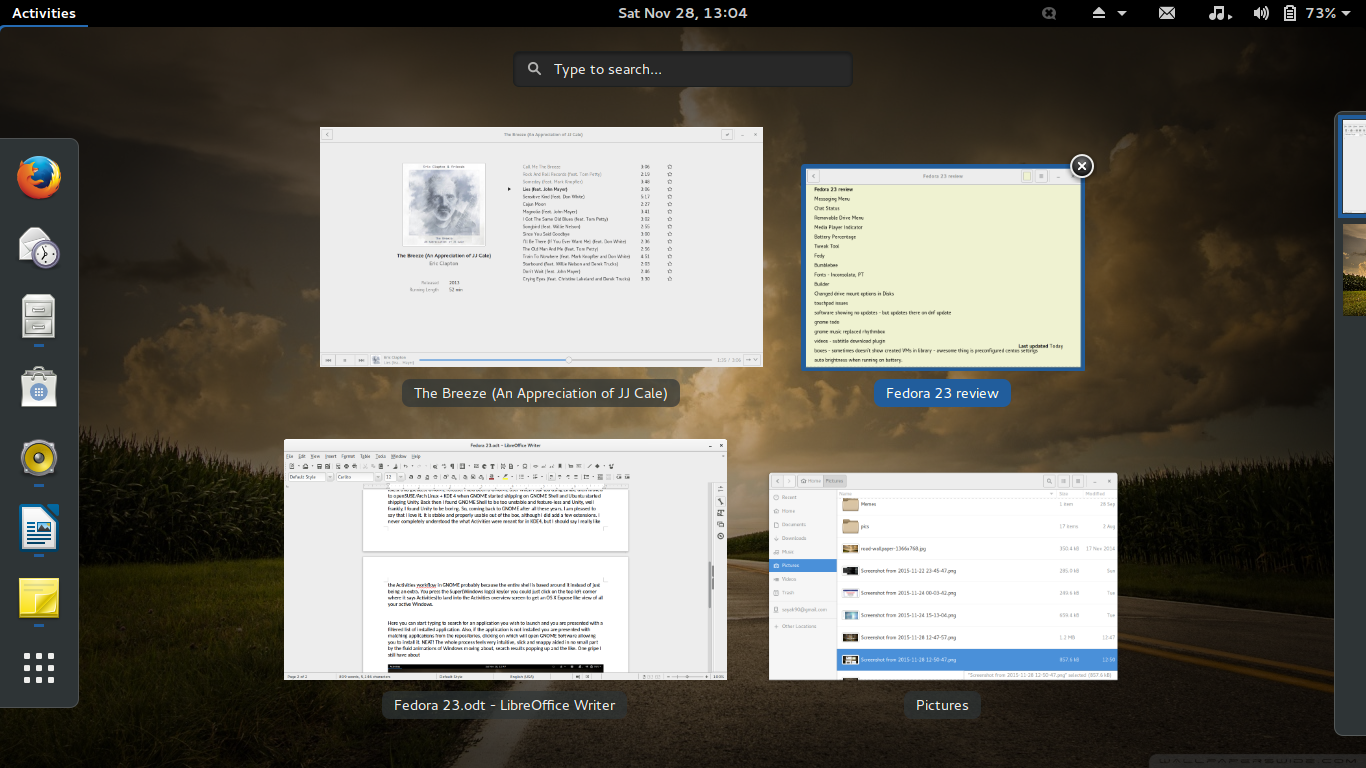
Here you can start typing to search for an application you wish to launch and you are presented with a filtered list of installed application. Also, if the application is not installed you are presented with matching applications from the repositories, clicking on which will open GNOME Software allowing you to install it. NEAT! The whole process feels very intuitive, slick and snappy aided in no small part by the fluid animations of Windows moving about, search results popping up and the like. There is also the Edge Tiling feature popularized by Windows 7. I guess it is now a part of all major Desktop Environments. One gripe I have about the GNOME UI is that there is no Minimize button by default. Looks like they never added it back once they removed it back in the early days of GNOME Shell. I agree that since there is no taskbar, it is now of little use. But seeing as all other environments and OS’s have this feature, they should keep it even if it just pushes the current backward into the stack. See, I still use Windows very frequently, as do a lot of other users I’d wager. Coming from there and booting up GNOME, I find myself moving my mouse to the top right and finding no Minimize button. I find this a bit jarring. Not having a maximize button is okay with me as I can maximize windows by double clicking the title bar and this is how I do it in other environments as well. Of course, it can be easily fixed by using the bloody brilliant GNOME Tweak Tool.
Fedora comes with the usual repertoire of LibreOffice, Evolution, Videos, Rhythmbox, Shotwell etc. that you find installed by default in a myriad of other distributions.
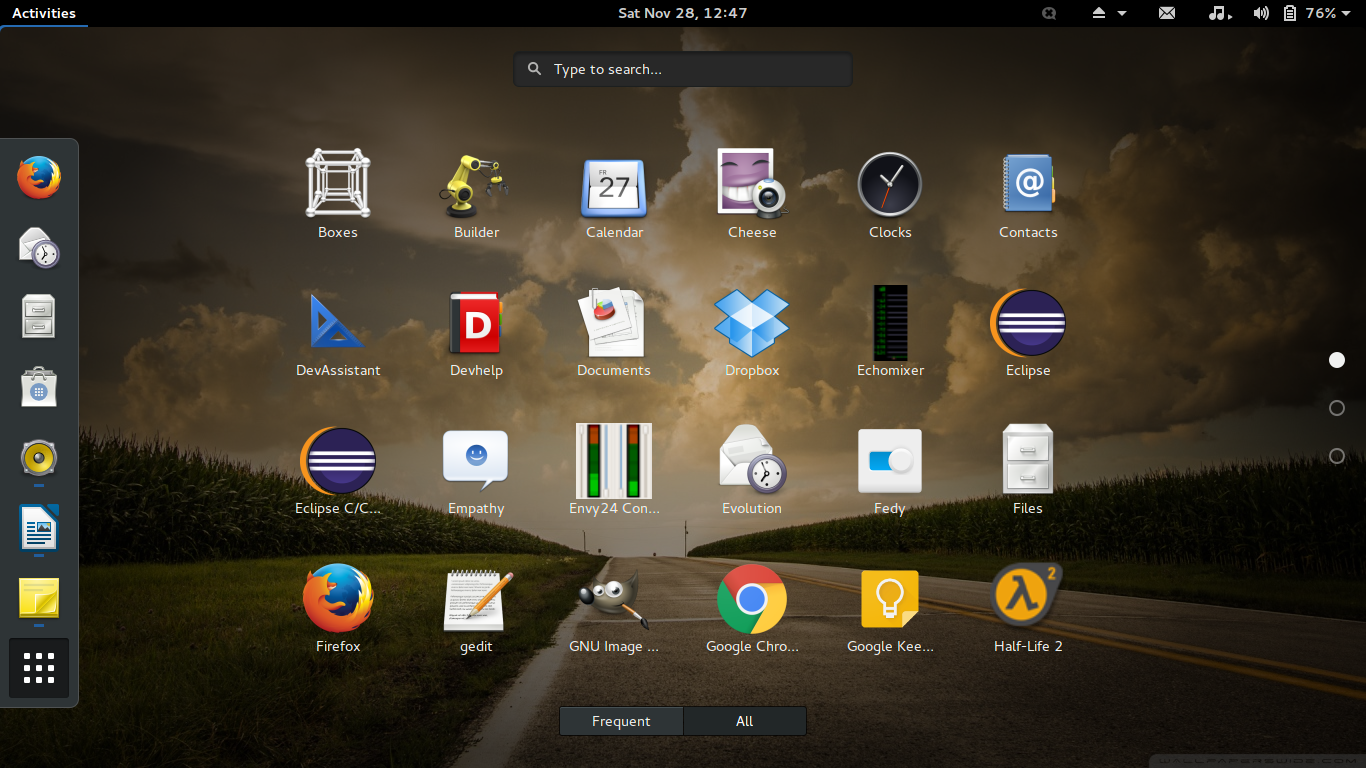
The first thing I did after booting into Fedora was install the GNOME Tweak Tool. I don’t understand why this is not installed by default. This application allows you to install gnome extensions, apply new themes and some general tweaks(like adding a minimize button!) with simple clicks. This is useful for beginners and power users alike and every GNOME distribution should ship this by default.
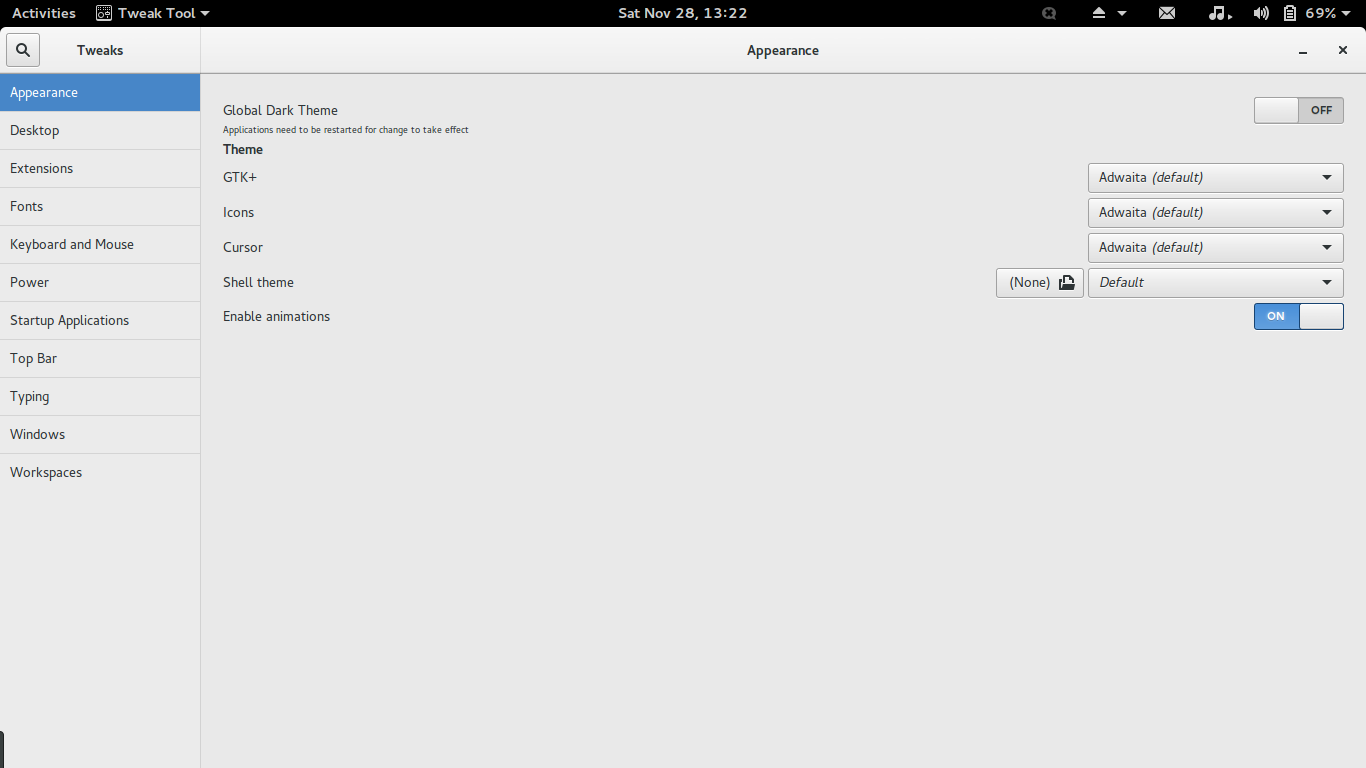
Also I installed Fedy from here, a really nice post-install tool which makes installing non-free codecs, microsoft fonts, google chrome, steam etc. a simple one-click affair. Cool stuff!
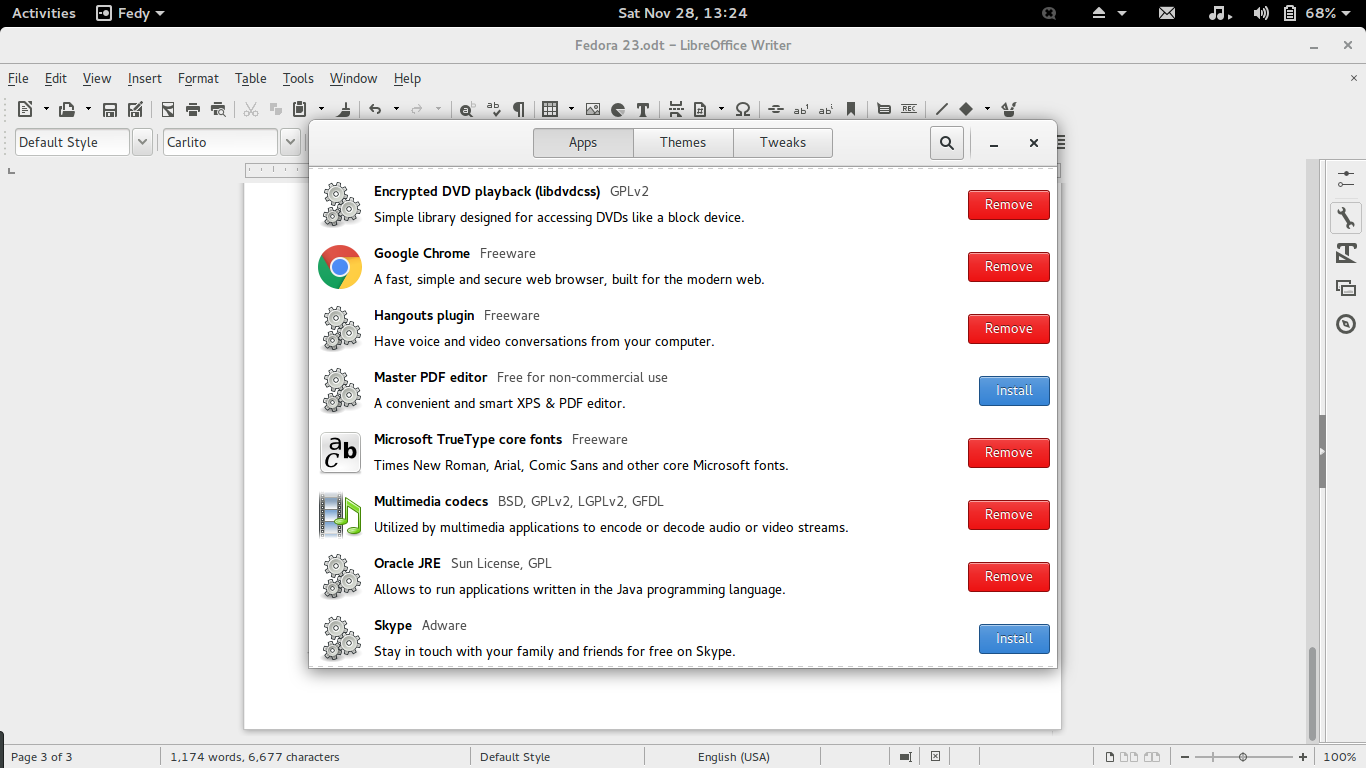
And now, a list of miscellaneous tweaks, additions, deletions, observations, likes and dislikes that I made from my usage.
-
I removed Rhythmbox and installed GNOME Music in its stead. Somehow, I feel Rhythmbox doesn’t really gel well with the GTK3 look and feel and GNOME Music was enough to cater to my Music listening needs.
-
I removed Shotwell and installed GNOME Photos. I will concede that I did just to get the complete GNOME feel :P
-
I installed Bumblebee along with the proprietary NVIDIA drivers from here. I did run into an issue where I installed just the 64-bit bumblebee libraries and Steam was refusing to start. It turns out Steam needs the 32-bit libraries to work. So, I installed the multilib bumblebee stuff and it got fixed.
-
Installed the Inconsolata and PT fonts.
-
Also installed GNOME Todo, Calendar, Transmission and Builder.
-
Installed the below extensions from extensions.gnome.org
-
Messaging Menu
-
Chat Status
-
Removable Drive Menu – make life so much easier if you are switching between external drives
-
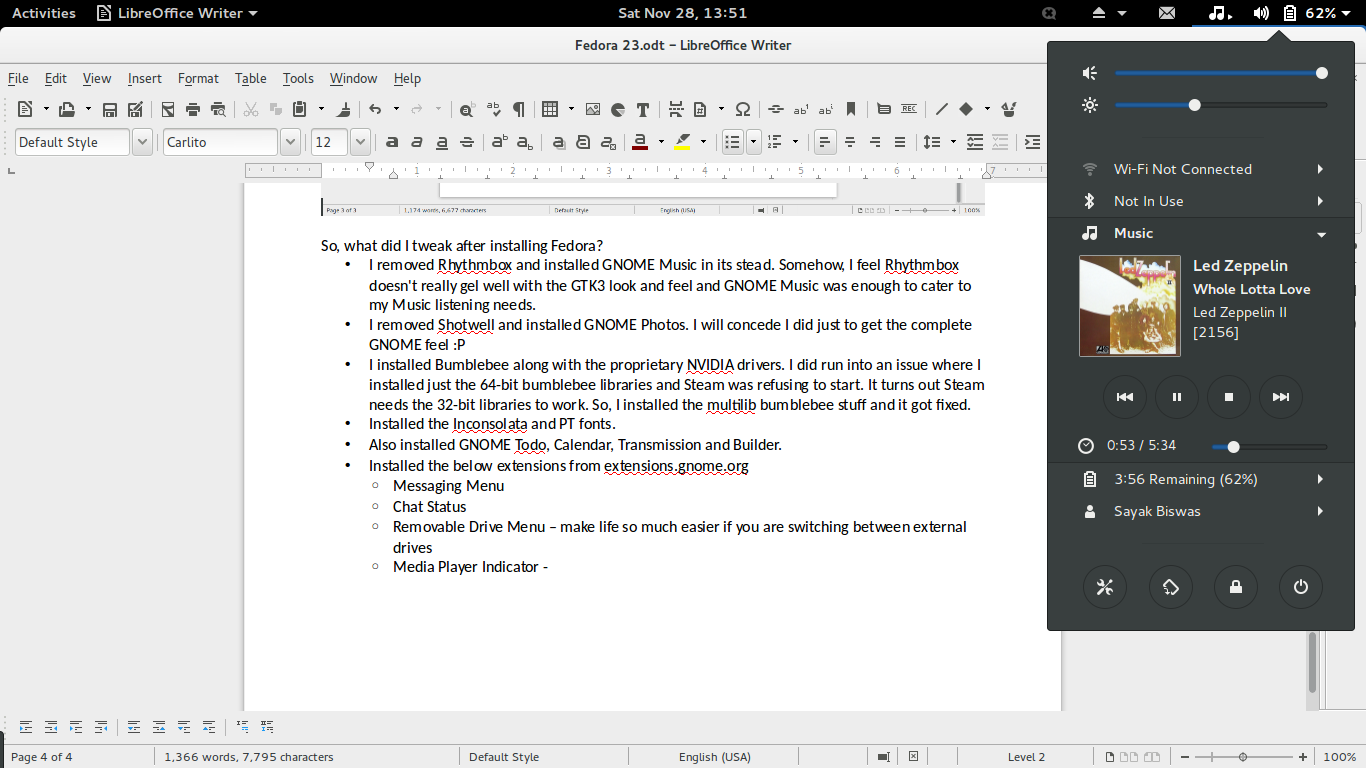
Media Player Indicator – A must have extension for me.
-
User Themes – Need this to install new GNOME-Shell themes.
-
Battery Percentage
-
-
As I mentioned earlier, I use a DATA partition to share stuff like Music, Videos and Pictures between Linux and Windows. So, usually I automount my data partition at boot-up on to a folder called /data with rw options. Then I would create symlinks of the folders from the /data location to my home folder. Previously, I used to edit the /etc/fstab file to accomplish this. This time I used GNOME Disks to do the same.
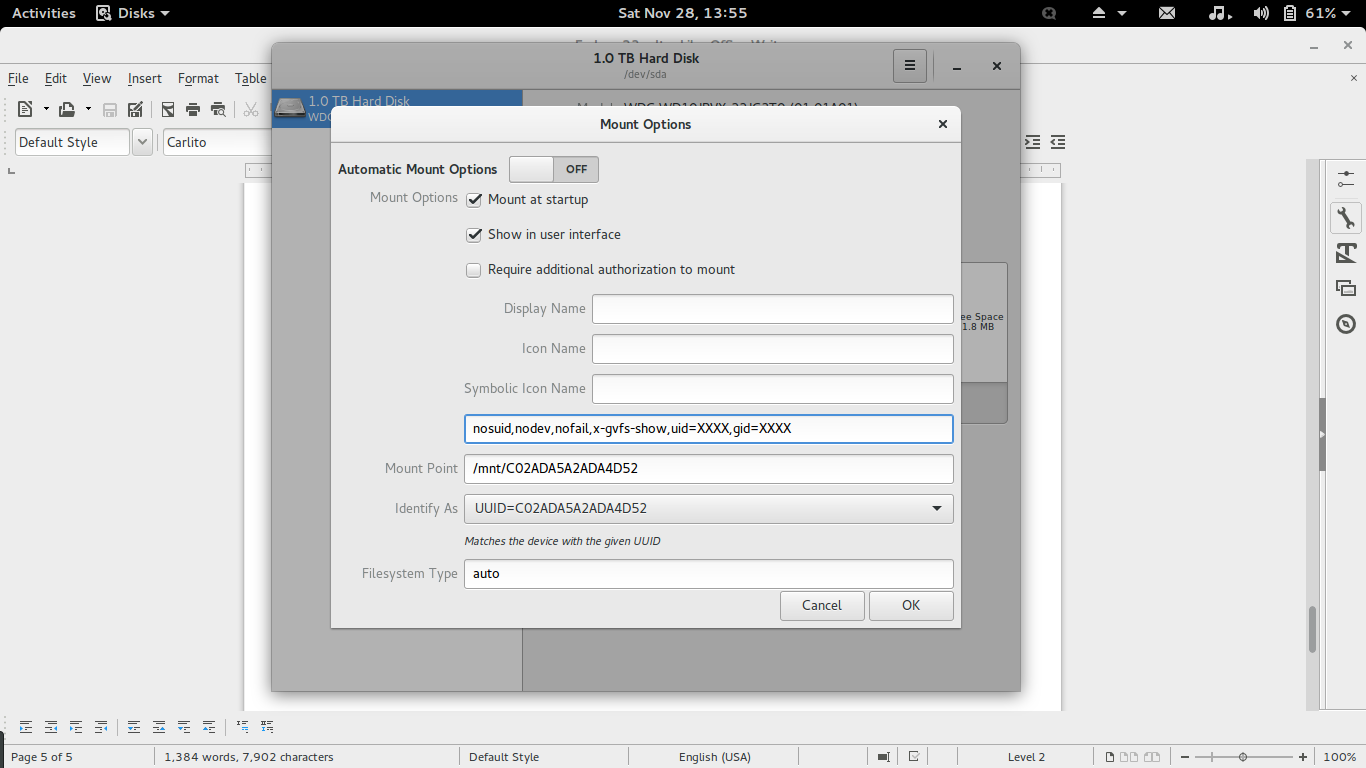 So basically, you open Disks select your partition, click on the gears icon, click Edit Mount options and you will be presented with the above screen.
-
Switch off Automatic Mount Options, check the Mount at Startup and Show in User Interface boxes.
-
Add the options
uid=<your user id>, gid=<your group id>You can get the ids by running
cat /etc/passwd | grep <your username>I would love to be able to get this information somewhere from the GUI, say the Users section in the Settings app.
-
Change the default mount point to whichever directory you want to mount your partition, /data for me.
-
Click OK and you are good to go.
-
Then I created symlinks from /data partition to my home directory by running commands similar to:
ln -s /data/Documents /home/sayakDolphin has this feature where if I right-click drag a folder to another directory, it asks me if I want to create a link. I would like to see something similar implemented in Nautilus as well.
-
-
Suspend and Resume seemed to work just fine. But I couldn’t find any option to put my system into Hibernate mode. If anybody knows how to do it, I would really love to know.
-
I was pleased to find that Videos now has the option to enable a plugin which allows you to download subtitles from the app itself. This is one feature that makes SMPlayer(on Linux) and PotPlayer(on Windows) my favourite video playback applications.
-
Another gripe regarding the GNOME’s UI design. It seems that as part of GNOME 3.16, the developers overhauled the file copy dialog. Now when you’re copying a file you get a tiny circle at the top right section of Nautilus’ header bar. This circle fills up with black as the copy operation progresses.
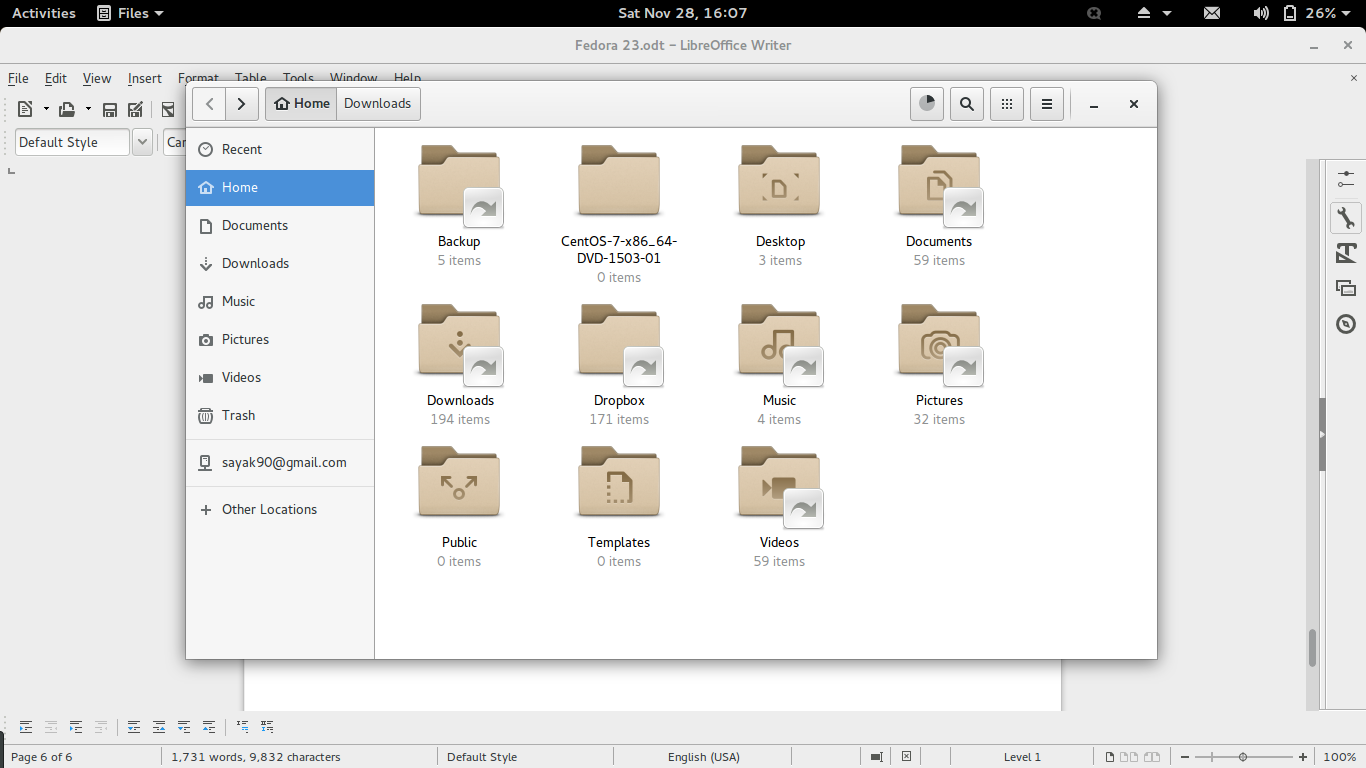 If you click on the circle, you get more details as in the shot below.
 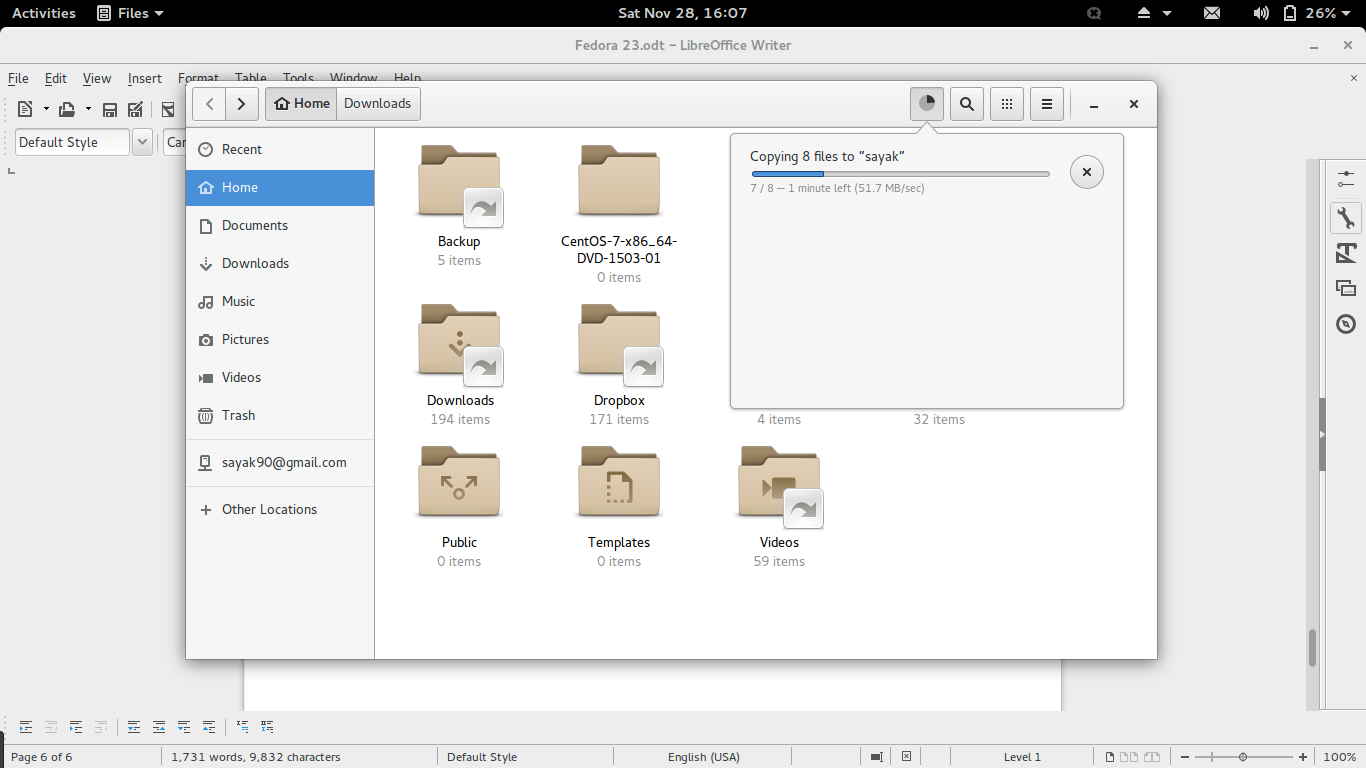 This looks pretty sexy if you are working in Nautilus all the while the file is copying. But if you are working on a different application during this operation you would have no way of knowing the progress other than alt-tabbing back to Nautilus. This has been talked about before by others as well and the solution seems to be taking this dialog off of Nautilus and placing it in the top right System Status menu, similar to KDE and Unity. This will make sure that the progress notification is always visible to the users.
 -
A new feature that arrived with GNOME 3.18 and one that I like quite a bit is the Google Drive integration. So, if you’ve added your Google account via the Online Account configuration section in the Settings Panel, you will find that the file manager now has a section with your gmail ID and a network icon on the left side. Click on it and you can access all your google drive stuff from here.
-
One thing that is missing and is useful for laptops is auto-brightness dimming when you lose power and you system is running on battery. On that note, I have also installed “tlp” which has been known to improve battery life on laptops. With tlp installed, my laptop gave me a run time of almost 5 hours on battery. It included watching an hour long episode of Doctor Who and listening to music on speakers while writing this review. Heck, I had even booted up my CentOS VM for a few minutes.
-
While on the topic of VM’s, I would like to say that Boxes is a potentially great tool. Although it needs some more polishing to become something I can recommend without any reservation. I have set up two Virtual Machines using Boxes, one for openSUSE Leap and other for CentOS 7. The setup was a breeze especially the one for CentOS 7. As soon as I selected the CentOS 7 iso, Boxes gave me the option to set up a preconfigured VM, asking me just for the username and password I would like to use. Once I provided those details, Boxes started the install procedure automatically. Next thing I knew there was a notification at the top of my screen saying CentOS box is ready to use. It didn’t ask me for anything else. I was like – WOW! May be this is something to do with the Fedora and CentOS relationship. I would definitely like to see similar features for setting up other, at least major, systems like openSUSE, Mint, Ubuntu and Debian. But everything was not peaches while using Boxes, there were times when I would launch Boxes and it would not show any of my two VM’s. I would need to relaunch the application for the VM’s to show up. Also, if I select an ISO from my NTFS drive for setting up a VM, the application fails and shows the error: “Box Creation Failed”. Wonder what’s going on there.
-
Another complaint relates to the update management. This is handled by GNOME Software’s Update module. Most of the time Software doesn’t show any available updates even if I manually hit the Check for Updates button. But then I go and do a
sudo dnf updatein the terminal or check for updates in Yumex, and I can see a whole bunch of software updates just waiting to be installed. I am not sure if there is some filter in Software that strips out some updates from the result list or something else is at work here, but it sure is weird.
-
Touchpad Issues – My laptop came with an Elantech touchpad. When I installed and booted Fedora for the first time the touchpad was very jumpy, to the point that I was unable to properly close any window. I just couldn’t aim for the X button. I didn’t run into this issue in openSUSE Leap KDE. It could be a regression in the new 4.2 kernel series, though that’s just me speculating. I searched for this issue in google and came across the below fix in Ask Fedora.
su
dnf install xorg-x11-drv-synaptics
cd /usr/share/X11/xorg.conf.d/
ln -s 50-synaptics.conf 99-synaptics.conf
reboot
Also, tap to click doesn’t work in the log in screen. If anybody knows a solution to this problem, please feel free to let me know.
In conclusion, I will say that Fedora 23 Workstation has been working really well for me. This is probably the most polished Fedora release I have ever used. Looks like their approach of focusing on three core products is working out quite well for them. I am really satisfied with this. The only thing I miss from openSUSE is the YaST control center. Oh Well! Maybe I should give Leap with GNOME a try.
Until next time!
